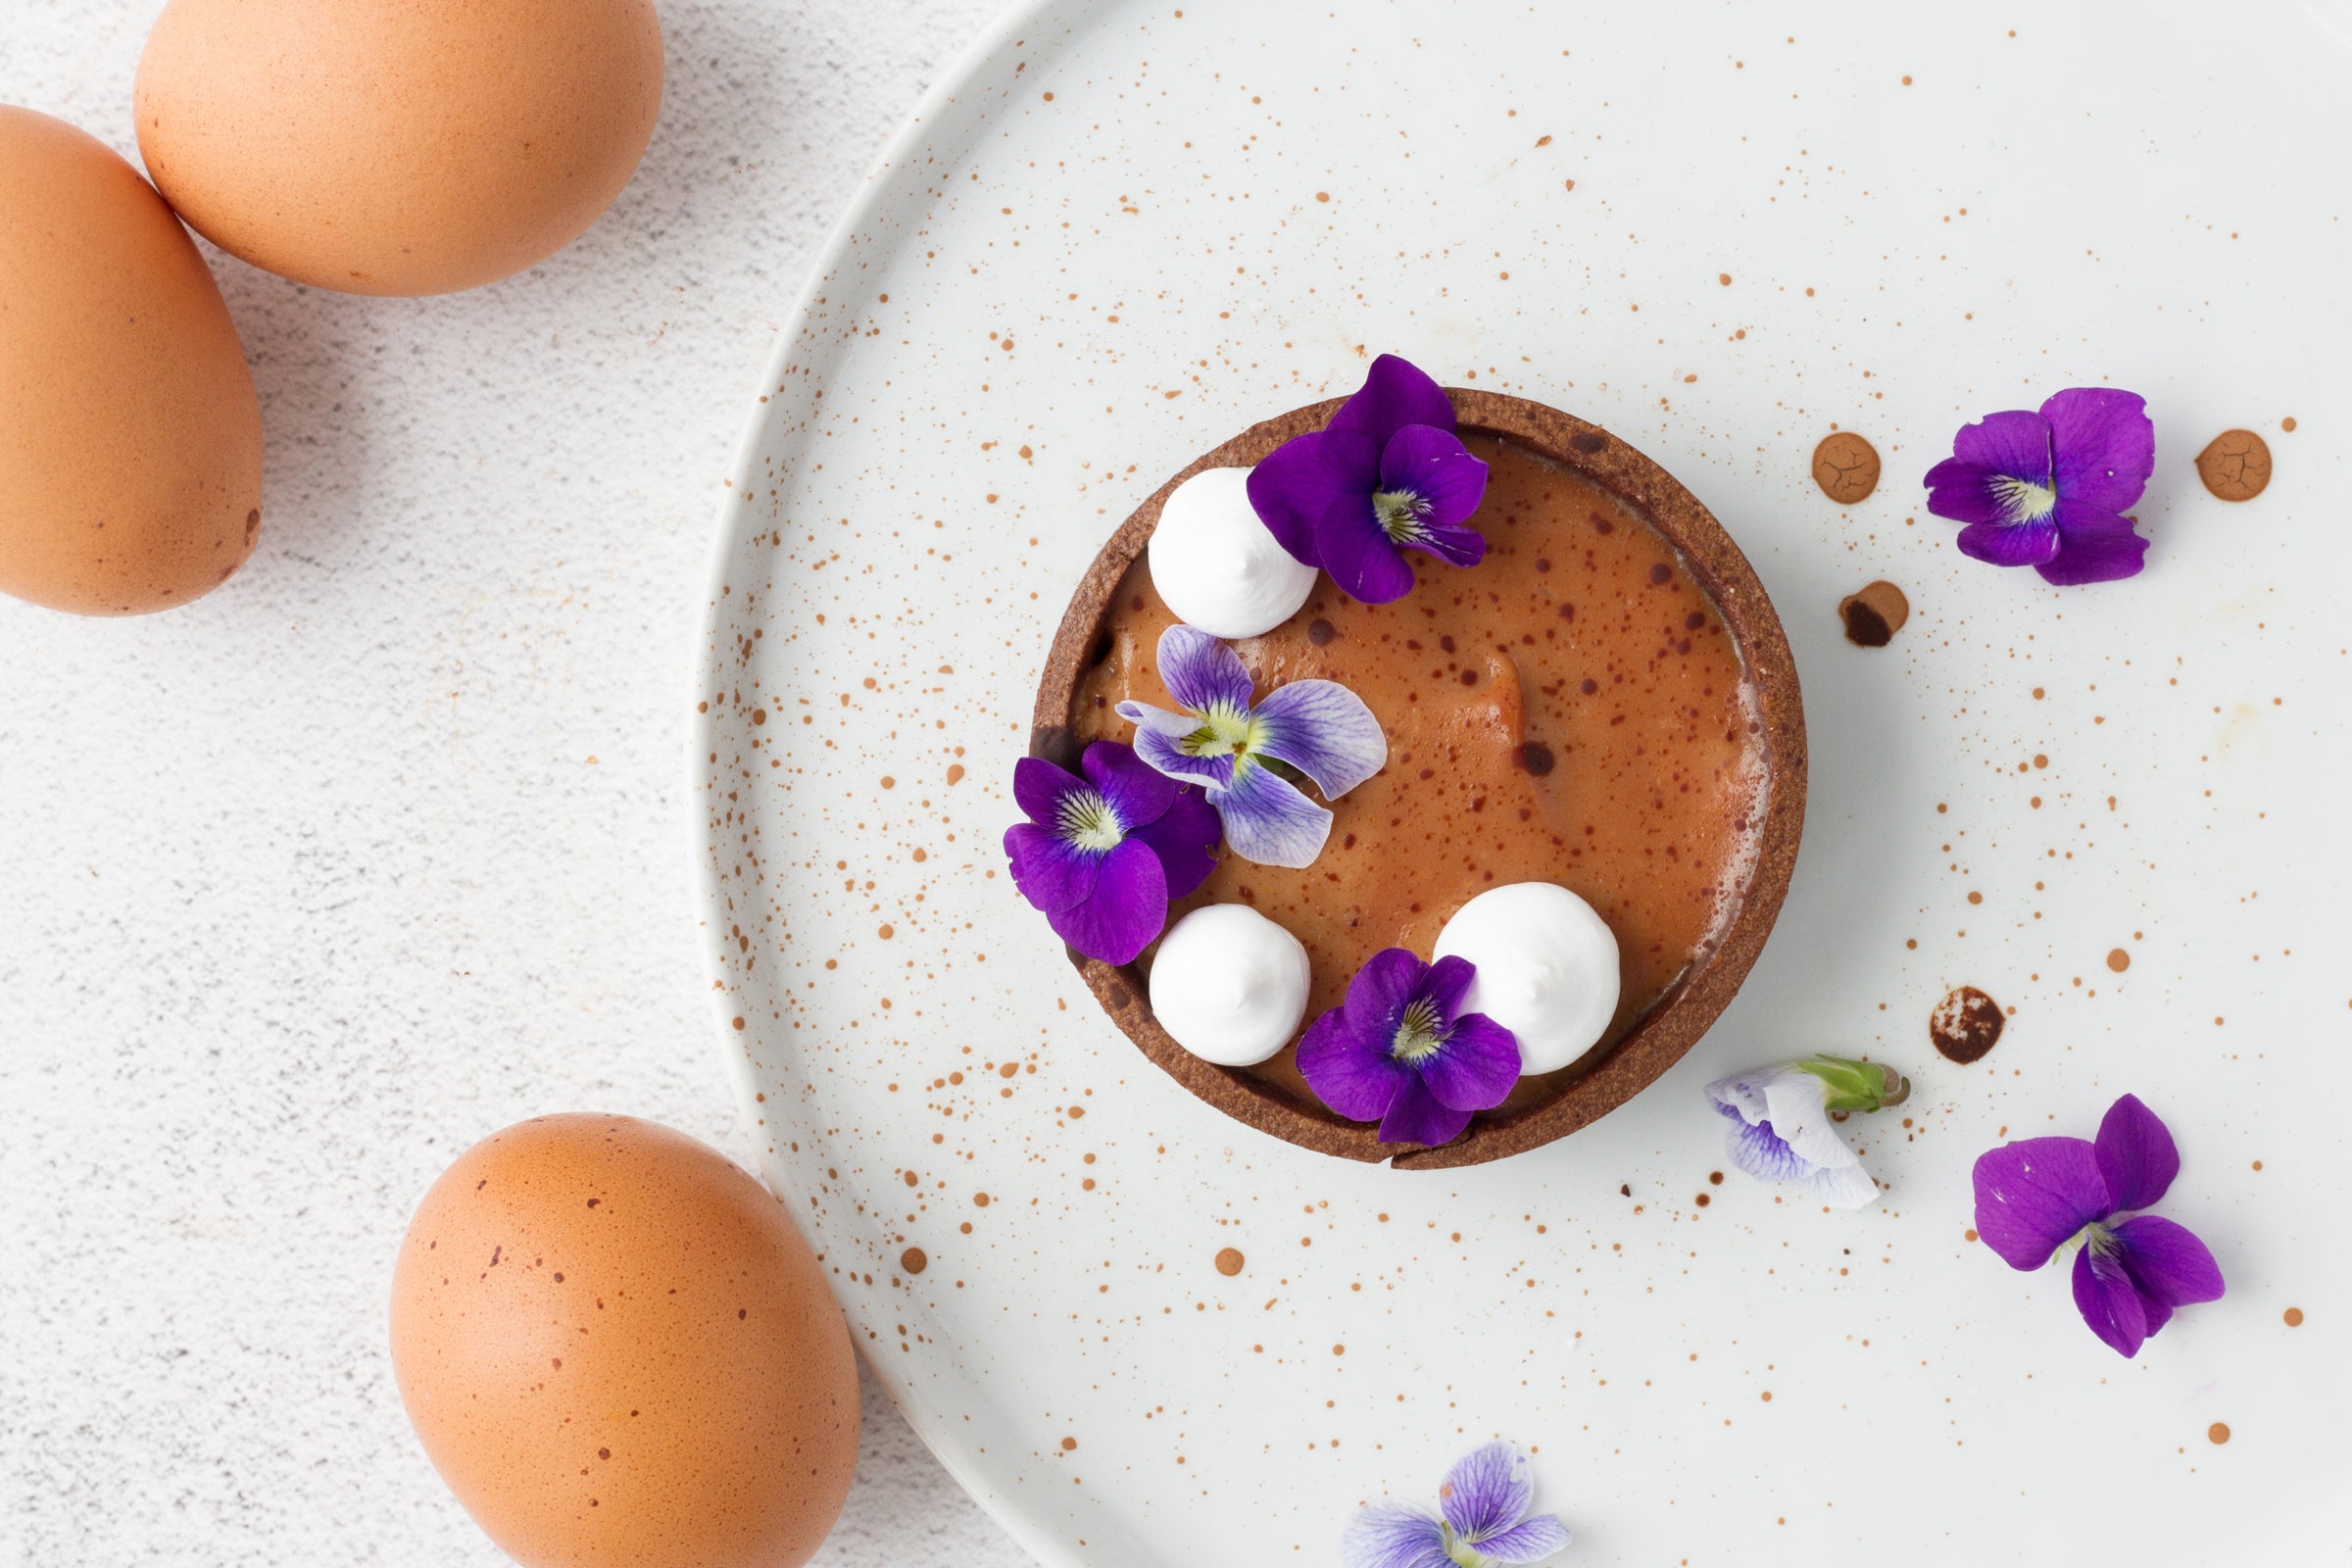
Speckled Cocoa Vanilla Tartlet with Edible Violets
Last year I started foraging and learning about wild edible plants and mushrooms. I’ve found everything from sweet muscadine grapes and autumn berries to savory chanterelle mushrooms.
There’s something very rewarding about hunting for something in the forest with no guarantees of finding anything. Because once you do find something, the thrill can be addicting!
Now that it’s Spring, tiny buds have begun to sprout and a lot of flowers have been the first to emerge. Last week I noticed that the violets were in full bloom and I knew I had to create something with this bountiful edible flower.

Violets are edible perennials that have five petals and heart-shaped leaves. These flowers tend to grow in shady areas in early spring and usually die off in hot summer temperatures. Like any wild plant, be sure to research all the identification features of edible violets before consuming.
This recipe is inspired by these seasonal Spring violets which accent the warm hues of a farm-fresh speckled egg. With natural food coloring, this classic vanilla custard is transformed into a beautiful shade of terra-cotta and finished with a splatter of cocoa vanilla slurry. This tartlet makes the perfect spring dessert.

Speckled Cocoa Vanilla Tartlet with Edible Violets
Start to finish: 4 hours
Active Time: 2 hours 20 minutes
Servings: 6 Tartlets
Specialty Tools
- 6 Perforated tart rings*
- Ceramic pie weights*
- Candy thermometer*
- Piping bag*
- Standing mixer or electric hand mixer
*Can be found in our French Tart Kit
Ingredients
Chocolate Pastry Dough
12 Tbsp. unsalted butter, cold, cubed
1 ¼ cup powdered sugar
½ tsp. salt
1 tsp. vanilla extract
4 egg yolks (reserve whites for meringue)
2 ¼ cups all purpose flour
½ cup cocoa powder
Vanilla Custard
2 cups whole milk
1 tsp. vanilla extract
6 egg yolks
⅔ cup sugar
¼ cup cornstarch
1 Tbsp. cold unsalted butter
For color:
2 tsp. cocoa powder
¾ tsp. beet puree (5-minute recipe here)
¼ tsp. turmeric powder
Speckle Slurry
3 tsp. vanilla extract
2 tsp. cocoa powder (sifted)
Meringue
1 ⅓ cup granulated sugar
⅓ cup water
4 egg whites, reserved (room temp)
Step 1: Make the Pastry Dough
1. Place cold butter cubes, powdered sugar, salt, and vanilla into a large deep bowl. With a stand mixer or electric hand mixer, begin mixing on low to prevent a dust cloud of powder. Once it starts to combine, increase the speed to high for 2 minutes or until the mixture is completely combined into a consistent creamy paste.
2. Mix in egg yolks on a low speed to gently combine. Use a spatula to scrape the sides of the bowl to thoroughly mix the egg and butter paste. Once homogeneous, turn off the mixer and scrape the sides of the bowl before the next step.
3. Add all the flour to the bowl and other dry ingredients if applicable. Mix on the lowest speed. Watch closely and turn off mixer as soon as all the flour has been incorporated to create a homogeneous shaggy dough.
4. Roughly shape the dough into a ball and cut in half.

Step 2: Roll out dough to 1/8" thick
1. On a piece of parchment paper, take one half of the dough and form into a smooth disc. Place a large piece of parchment paper or plastic wrap on top to prevent sticking.
2. With a rolling pin, start in the center of the dough disc and use even pressure to roll the dough away from you. Rotate the dough 90 degrees and repeat, turning the dough until it reaches an even 1/8” thickness. A thin, even crust is a crucial part of an even bake and a delicate tart shell.
3. Clear space in your refrigerator so that the rolled dough can lay flat. Using a cookie sheet, slide the parchment paper and dough off the counter and into the fridge.
4. Repeat for the second half of the dough. Chill for at least 1 hour or overnight.
Step 3: Cut out base and walls
1. Remove one half of the chilled dough from the fridge. Flip the dough over and carefully peel off the bottom layer of parchment paper. This will ensure that you have no issues with sticking or tearing. If the dough is brittle and easily breaks, it’s too cold. Allow to thaw for a few minutes.
2. Before cutting the dough, arrange three tart rings so that there is enough room for three 11 x 1 ¼” strips. Once laid out, cut out the circles and place the dough and tart ring on a parchment lined baking sheet. Use a knife to cut the three strips and square off the ends.
3. Lift the strip and line the inside of the tart ring. Lightly press the strip down and against the sides of the ring. Curl the excess strip on the inside and with a paring knife, trim at a 1/8” overlap. Use the warmth of your fingers to press and blend together the seam.
4. Repeat process for other half of dough.
Step 4: Chill, trim, and bake tartlet shells
1. Preheat the oven to 320˚ F.
2. Place the baking sheet with all six rings in the refrigerator for 10 minutes. Chilling the dough will ensure a cleaner trim. Do not put in the freezer. Meanwhile, cut six 5 x 5” parchment squares as big as the dotted lines on this page.
3. Once chilled, use a paring knife to pick up each ring and trim off the excess dough. Turn your knife to be horizontally flush with the edge of the ring.
4. Line the tartlets with parchment paper squares and evenly distribute the pie weights to fill each tart. The ceramic baking weights will prevent the pastry dough from bubbling on the bottom.
5. Bake for 25-30 minutes at 320˚ F. Finished tart crusts will have the pale color and consistency of a shortbread cookie. Remove the tart rings and ceramic balls once cooled.
Step 5: Prepare the custard filling
1. In a medium saucepan, heat the milk and vanilla extract to a boil over medium heat.
2. In a medium bowl, whisk the egg yolks and sugar until thoroughly combined.
3. Using a small sieve to eliminate lumps, sift the cornstarch and whisk vigorously. Whisk in 1/4 cup of the hot milk until incorporated.
4. Whisk in the the remaining hot milk, reserving the saucepan. Pour the mixture through a strainer back into the saucepan. Cook over medium-high heat, whisking constantly, until thickened, about 1-2 minutes.
5. Remove from heat and stir in butter, cocoa powder, beet puree, and turmeric powder.
6. Pour into prepared tartlet shells while still warm.
7. Mix the slurry ingredients and splatter onto tarts with a toothbrush or stiff brush.

Step 6: Whip up the meringue
1. Slide and adjust the candy thermometer to fit a small saucepan, ensuring the tip isn’t touching the bottom. Add sugar and water and place on stovetop over high heat.
2. Meanwhile, whisk egg whites on low speed with an electric hand mixer or stand mixer.
3. On the stovetop, the sugar and water should be boiling. Be patient and wait until the mixture reaches 250˚ F on the candy thermometer. The exact temperature is important.
4. At this point, the egg whites should look like a thick foamy bubble bath. While still mixing, slowly begin to spoon the hot sugar syrup into the bowl 1 tablespoon at a time. Whisk on high speed for a full 6-8 minutes until the mixture cools and reaches a consistency of old-fashioned shaving cream.
5. Pipe meringue directly onto tarts and decorate with fresh violets or pansies.
Enjoy this lovely spring dessert!
Whether this is for an Easter brunch table or just because, I hope this decadent dessert transports you to the patisseries of Paris. Tell us below, have you ever cooked with edible flowers?
